System Components
Account Pages
System Settings
Timeline Builder
This tool allows you to display a list of records in chronological order.
The form should have the following fields:
- Date: A date or datetime-local field.
Note: Timeline Builder is only available on the Pro plan.
1- List Page: This page displays all records of the component, with options to customize the view and export the data.

Read more about the list page and how to customize the table through this link.
2- Create: This action allows you to create a timeline.
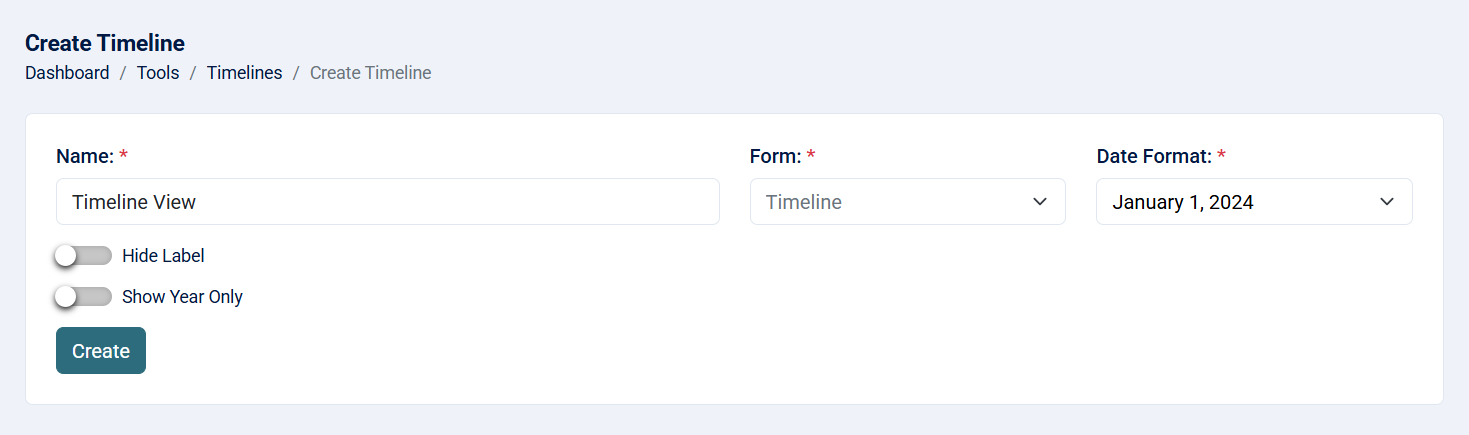
- Name: Name of the timeline (required, maximum of 255 characters).
- Form: The form that you want to use to create a timeline view (required).
- Date Format: This is for the main date format of each record (required)
- Monday
- Monday, 15
- May 15
- May 15, 2025
- Thursday, May 15, 2025
- Hide Label: if checked, the fields label will not appear in the timeline card view.
- Show Year Only: if checked, the year will only appear instead of full date.
3- Timeline Designer: After creating the timeline, you will be redirected to the timeline designer where you can design the timeline.
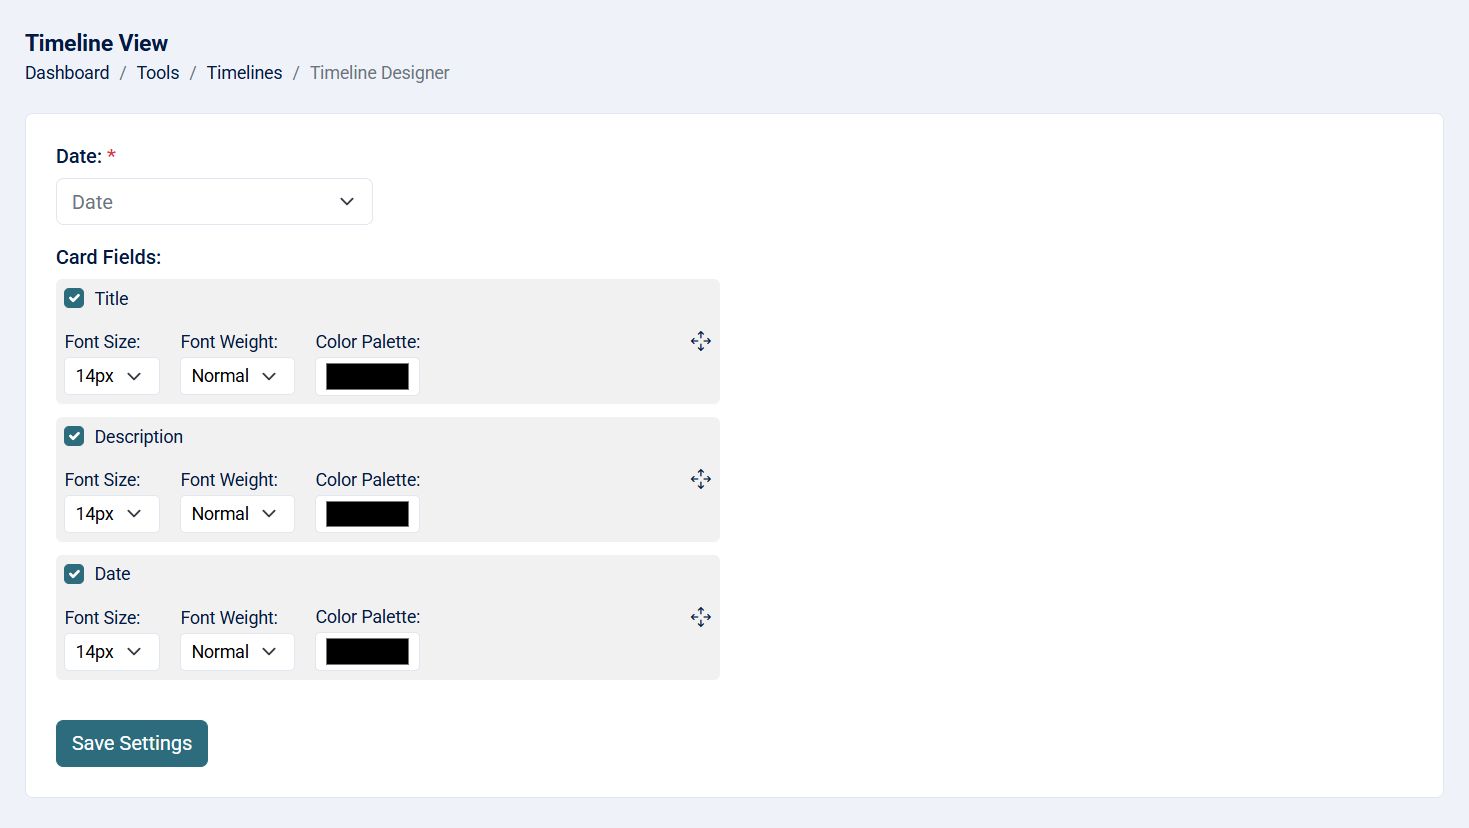
- Date: Choose the field that will act as main date.
- Card Fields: Select the fields you want to show in the timeline card. You can also change order of these fields.
- Field: If checked, the field will be displayed in the timeline card.
- Font Size: Controls the text size for the field value. Acceptable values range from 14 to 20 (in pixels).
- Font Weight: Choose between normal – Regular weight and bold – Emphasized weight.
- Color: The text color of the field.
- Cross Icon (Drag Handle): Allows you to reorder the fields using drag-and-drop functionality.
4- View: This action allows you to see the timeline details.
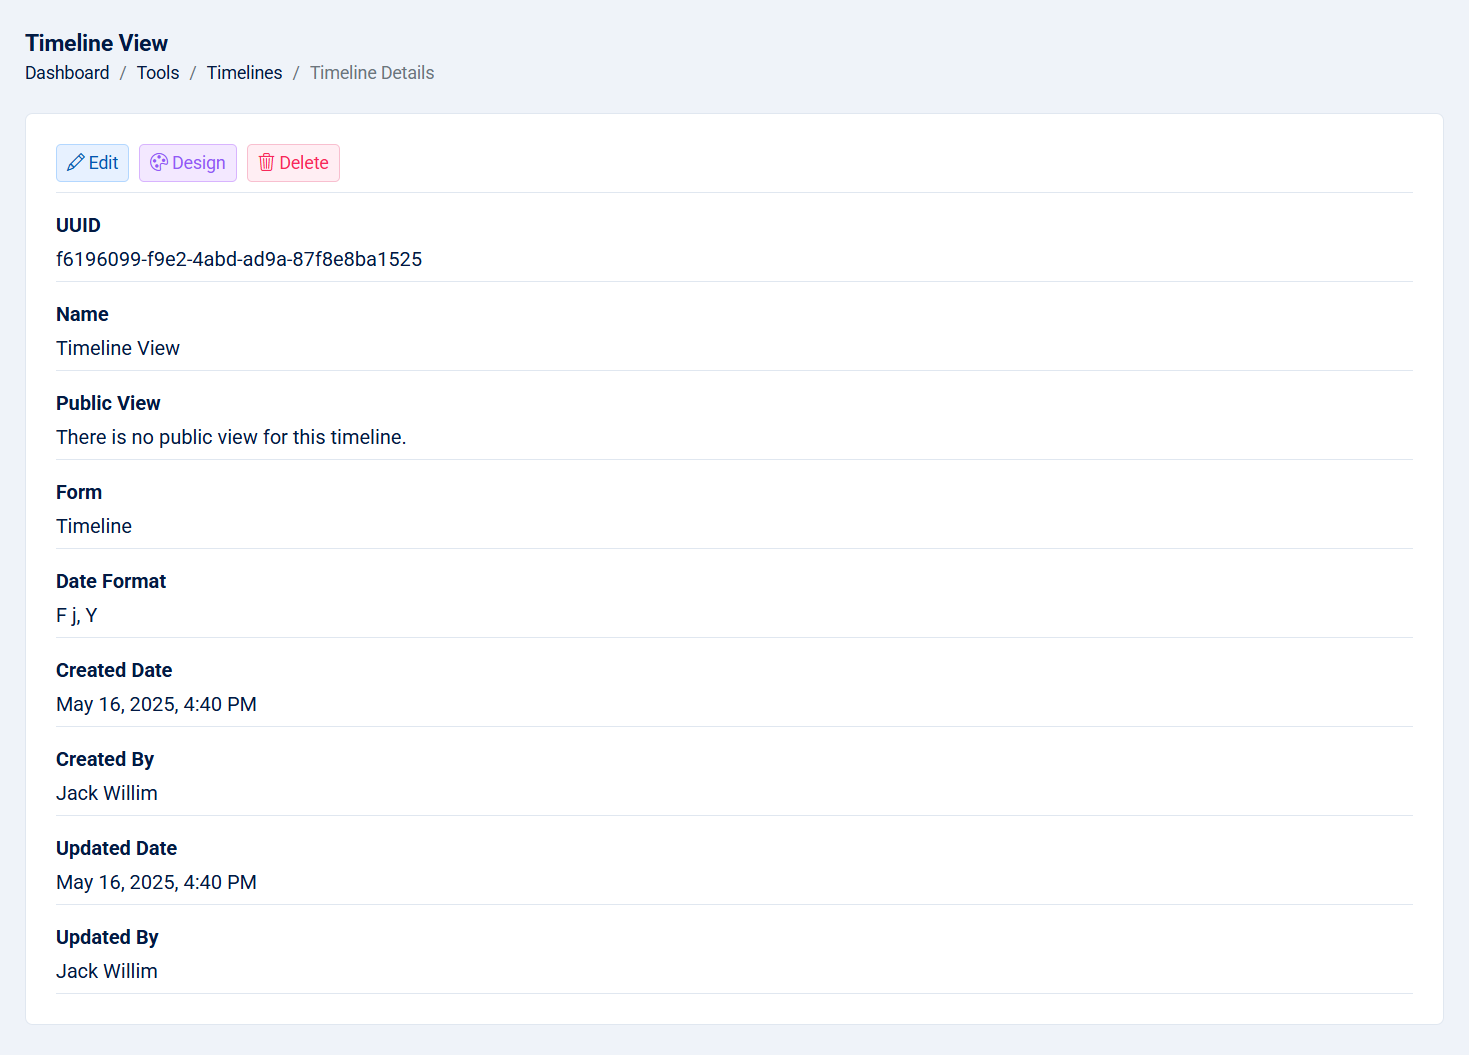
- UUID: The UUID of the timeline.
- Name: Name of timeline.
- Public View: If checked, a public link to the timeline view will be displayed, along with a button to copy the link directly for easy sharing.
- Form: The form used to create the timeline.
- Date Format: The date format of the timeline.
- Created Date: The created date of the timeline.
- Created By: The creator of the timeline.
- Updated Date: The updated date of the timeline.
- Updated By: The person who updated the timeline.
5- Edit: This action allows you to edit the timeline.
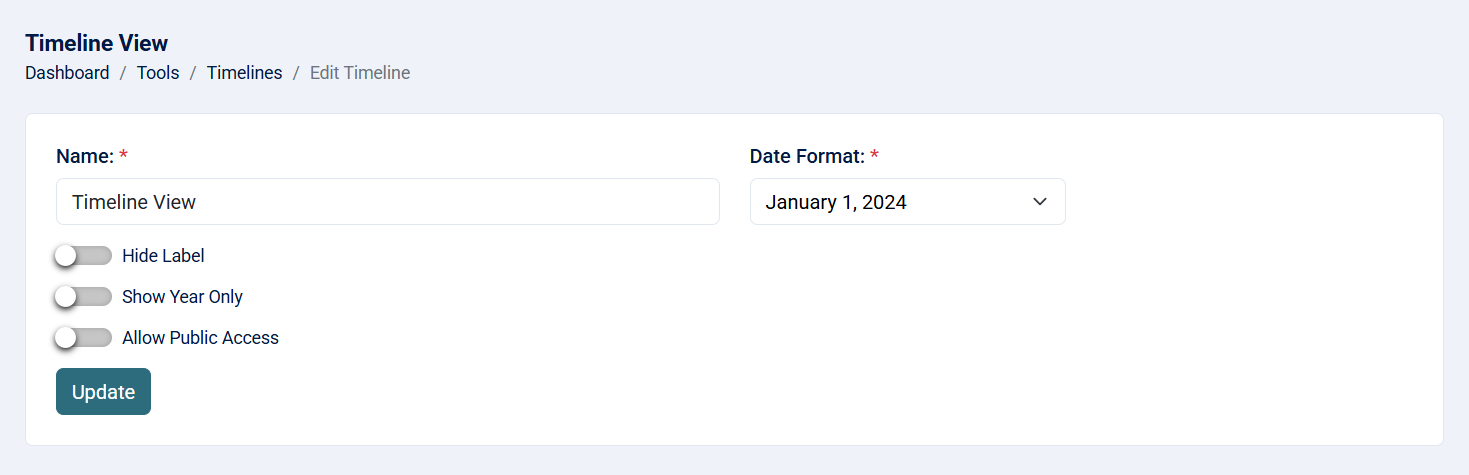
- Name: Name of the timeline (required, maximum of 255 characters).
- Date Format: This is for the main date that will be as a title or tab text based on the selected template (required)
- Monday
- Monday, 15
- May 15
- May 15, 2025
- Thursday, May 15, 2025
- Hide Label: if checked, the fields label will not appear in the timeline card view.
- Show Year Only: if checked, the year will only appear instead of full date.
- Allow Public Access: If checked, the timeline view will be publicly accessible without requiring authentication. This is ideal when you want to share a timeline with others—such as sending a link to external users—without needing them to log in.
Note: That you cannot edit the form chosen when creating the timeline.
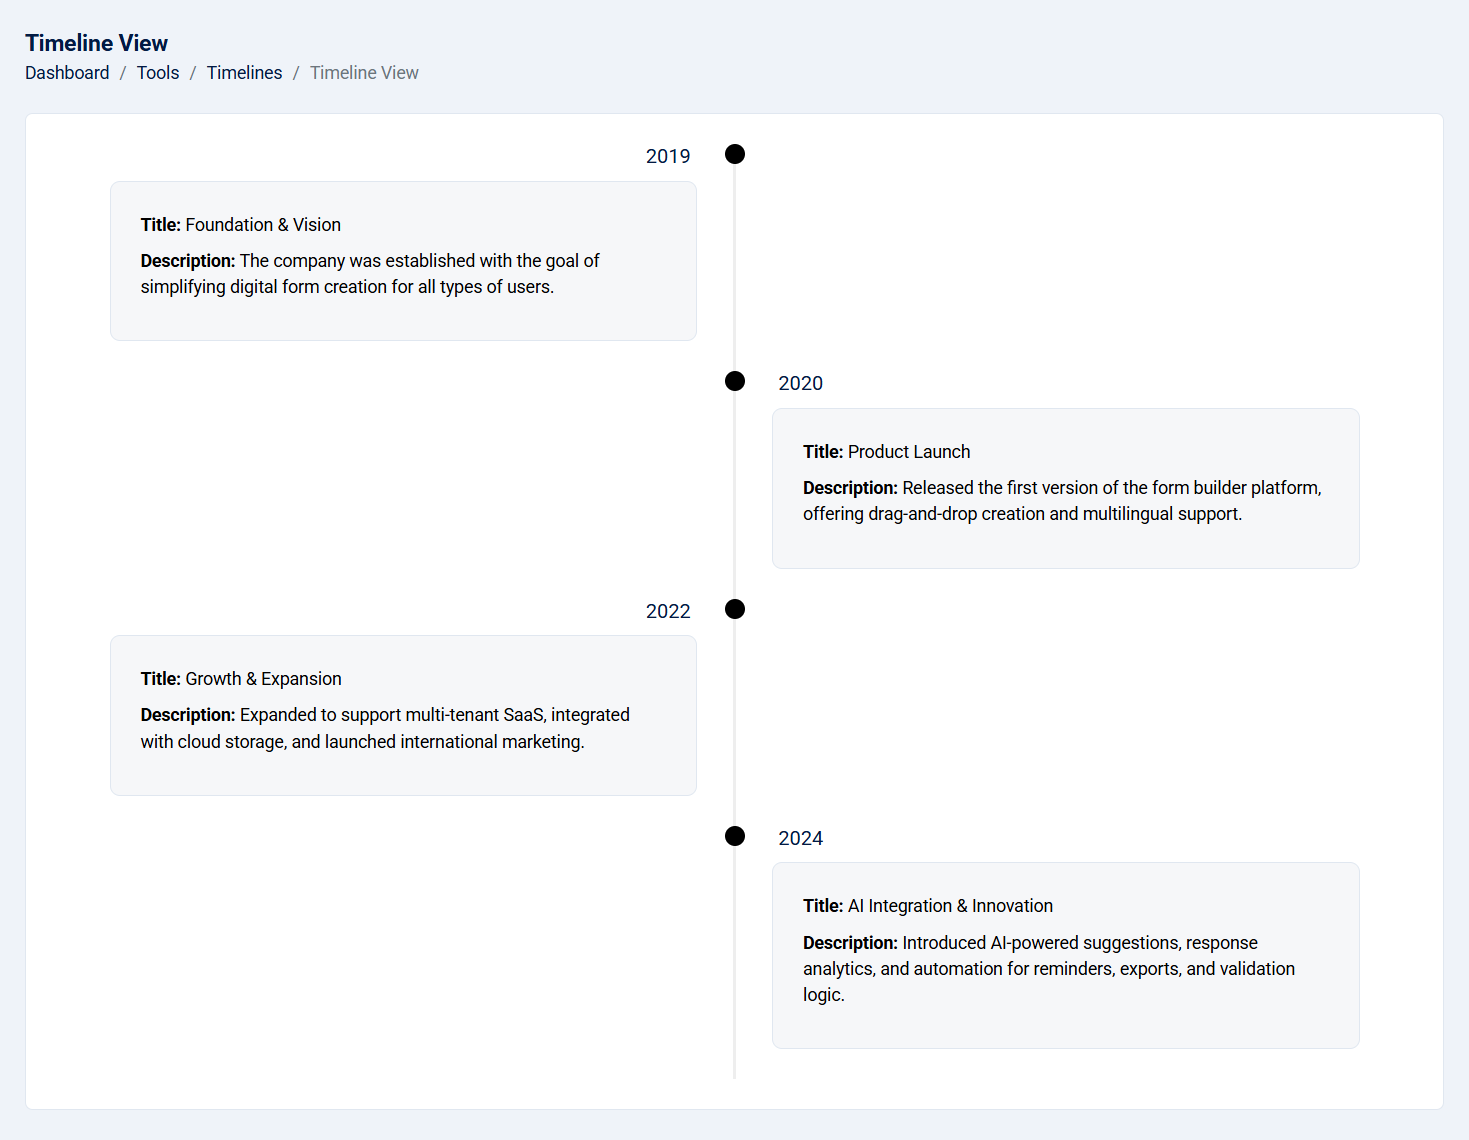
6- Timeline View: This page allows you to see the form like a timeline.
8- Timeline Public View: If the public access enabled, you will have a link to access to public view.
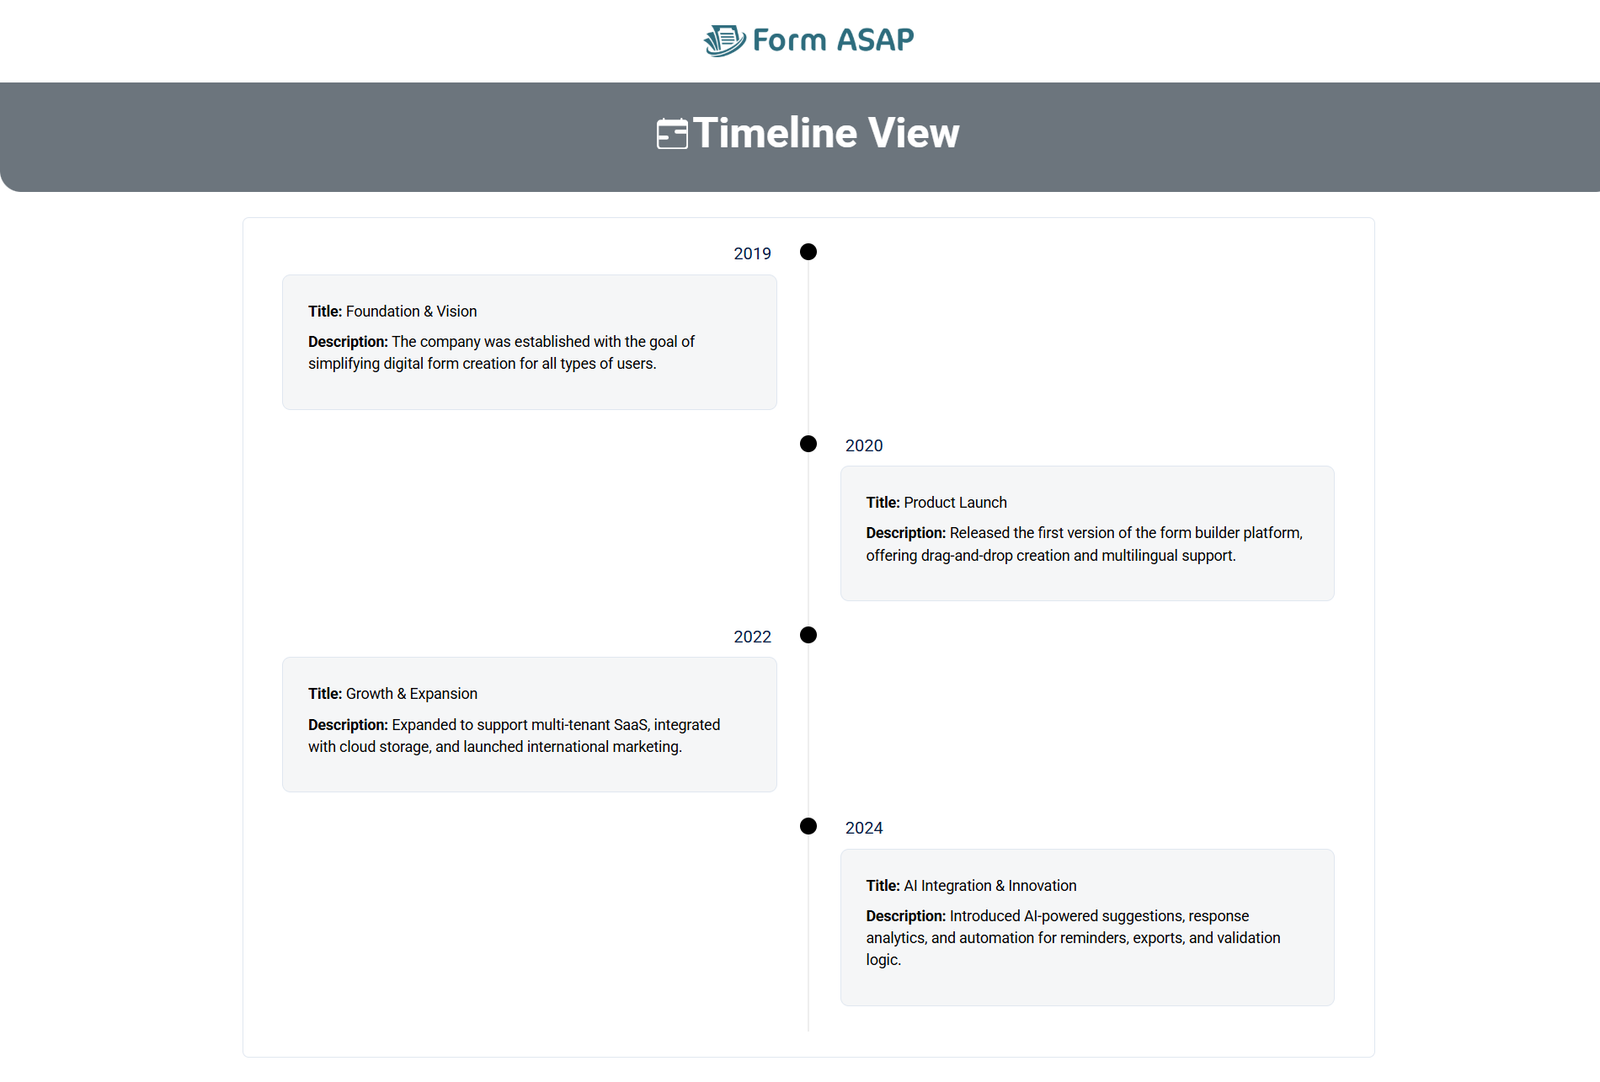
Note: You can get the public link from the edit page under 'Allow Public Access' or from the timeline details page.
7- Delete: This action allows you to delete the timeline.
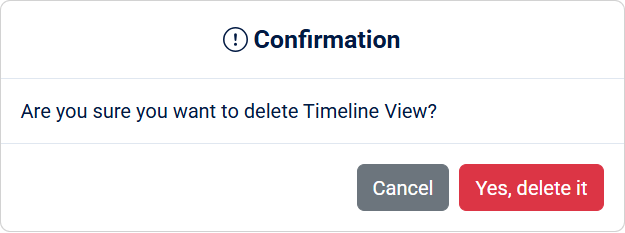
Note: This action cannot be undone.